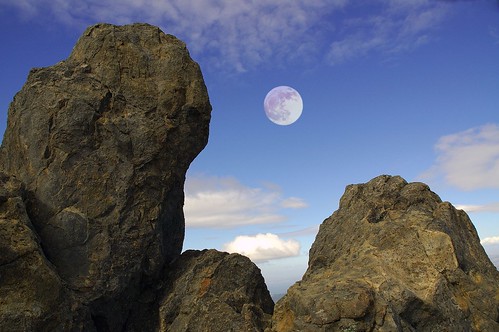
These rocks near the top of Mount Tamalpais seemed to call out for a moon, and I few entries ago I photographed a moon to paste (It’s Always Nice To Have a Moon). Actually, the scale is all wrong! The rocks are about three inches high – but don’t tell!
To paste the moon into the landscape:
- Open both images in Photoshop at roughly the same level of definition. It’s best to work on something like this as a PSD file (Photoshop’s internal format) so you’ve got plenty of saved history in case you want to revert
- In the moon image, use the Magic Wand tool to select the black night sky around the moon
- Choose Select, then Invert Selection to just get the moon
- Choose Select, then Modify – Contract to make the selected area smaller by 1 or 2 pixels. This will make sure the moon doesn’t have a black line around it.
- Choose, Select, Feather, 2 pixels to make the moon edge still softer
- Copy the selected moon
- Paste it into the landscape with rocks
- Move, resize, rotate to taste
- In the Layers palette, with the moon on a layer, decrease opacity to about 80%
- Save it as a JPEG (or whatever format you need)
That’s all you need to shine on big bright ersatz moon!

Pingback: Photoblog 2.0: » Photoblog 2.0 Archive: » Processing a Digital Photo
Pingback: Photoblog 2.0: » Photoblog 2.0 Archive: » Moon over Lake Tahoe