A friend said to me: “I’ve been reading your blog. What is all this stuff about xrays, photograms, and cross-processing? And, could you answer in plain English, please, so I can understand what you are talking about!”
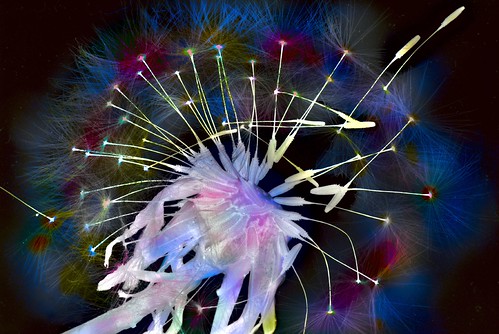
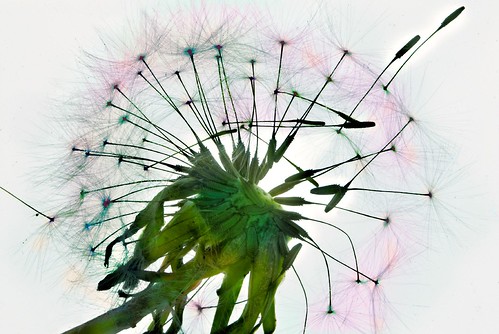
The image above is a digital photogram of dandelion, cross processed to create the colored effect. You’ll find a plainer version of the dandelion photogram at the bottom of this story.
In classical silver halide film-and-paper photography, a photogram was created by exposing an object directly on top of a piece of photosensitive paper or film without using a camera as an intermediary. The object laid on top of the paper created a kind of shadow, because the area below it was not exposed while the area not covered was. Man Ray created some of the most famous photograms, which he called Rayograms.
Here’s how I got interested in the whole area of exposing digital imagery via alternative processes, and coming up with digital-era workflows that produce images like silver-halide era alternative processes.
The ArtBeats division of New York Graphic Society asked me to come up with some imagery for their art print program. They were interested in xray images of florals.
Looking into the matter a bit, I learned that all xrays, whether film or digital, are monochromatic. So the colored “xray” images that NYGS wanted me to imitate had started as black&white xray film images that had later been hand-tinted (either digitally or using retouching paint).
Next, I discovered that the digital xray units I was likely to be able to lay my hands on didn’t have enough resolution to produce quality imagery. This was bad news, and I thought of actually acquiring an analog xray device so I could proceed. Then I realized that digital cameras are sensitive to light both above and below the visible spectrum, ultra violet (UV) and infrared (IR) light. Conventional xrays are on the UV side of the spectrum, but both sides can produce xray-like effects. These photos of a starry sky at night and of an Indian paintbrush show digital capture of light spectra that are invisible to the naked eye.
Digital cameras are, in fact, so sensitive to IR that they are all equipped with an internal filter to reduce IR sensitivity. Most cameras can be retrofitted for additional IR sensitivity by removing or modifying this filter (don’t try this at home!). In addition, certain external filters can be used to boost both IR and UV sensitivity.
I thought this was a much better place to start producing the NYGS images than an old-fashioned xray machine.
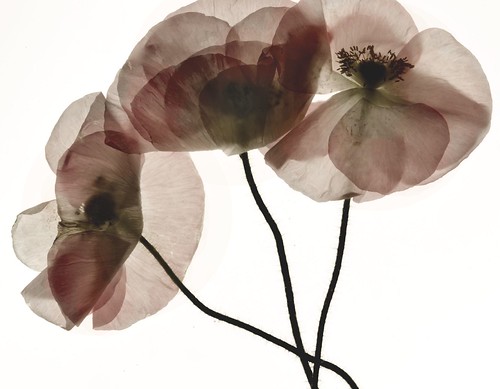
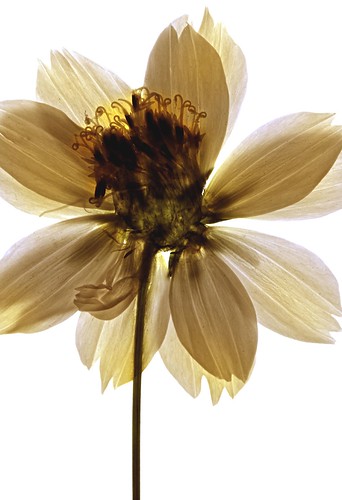
Here are the two images that Art Beats choose for their first prints in the program, Papaver Rhoeas and Cosmos Sulphereus:
View this image larger.
View this image larger.
Once I started thinking about xrays, I also began to wonder about other (and different) ways to capture digital imagery. It occurred to me that I could replicate a photogram effect in a number of ways. Since a digital camera is a scanner with a lens in front, if one could blast enough light through the subject one would essentially end up with a photogram. I also figured out a way to create the initial capture using a flat bed scanner, and then use the image processing engine in one of my cameras to render the image into the vendor’s proprietary RAW file structure.
Of course, with any of these techniques digital being digital, I still needed to post-process the captures. This led me into the realm of cross processing.
In the bad old days of film, cross processing meant to process film or paper in a chemistry different from that intended. For example, E6 film could be processed in C41 chemistry, with unpredictable and sometimes exciting results.
There’s no precise analog to cross processing digital images in Photoshop, but there are a variety of different effects that could be compared to cross processing because their visual impact is somewhat similar. Two common ways to achieve cross-processing effects are to fiddle with curves, and to use a layered gradient map with different blending modes.
My own cross-processing technique is complicated, and starts with the use of LAB color. I plan to explain some of the details of the process in a future story.
Related links: Photograms topic on my blog, Photogram portfolio page, my photogram set on Flickr, Is It Photography?, Cross Processing, Photograms for the Digital Era, Rayographs.
View this image larger.


Pingback: Photoblog 2.0: » Photoblog 2.0 Archive: » Jet Engine
Pingback: Photoblog 2.0: » Photoblog 2.0 Archive: » Orchidaceae
Pingback: Photoblog 2.0: » Photoblog 2.0 Archive: » Bamboo for You
Pingback: Photoblog 2.0: » Photoblog 2.0 Archive: » Glad in Pink
Pingback: Photoblog 2.0: » Photoblog 2.0 Archive: » Night for Day
Pingback: Photoblog 2.0: » Photoblog 2.0 Archive: » Flowers on White
dsbrennan
27 Dec 2006I’m fascinated by the resulting images, but your explanation still leaves me confused as to how you created a digital photogram or x-ray image. Did you use IR or UV lenses (or both)? A light table? A scanner? Please do tell – thanks!
Pingback: Photoblog 2.0: » Photoblog 2.0 Archive: » A great way to start the year!
Pingback: Photoblog 2.0: » Photoblog 2.0 Archive: » Alstromeria
Pingback: Photoblog 2.0: » Photoblog 2.0 Archive: » Gaillardia Photogram
Pingback: Photoblog 2.0: » Photoblog 2.0 Archive: » White Simplicity Rose
Pingback: Photoblog 2.0: » Photoblog 2.0 Archive: » Star Anise
Pingback: Photoblog 2.0: » Photoblog 2.0 Archive: » Ringing Cedars Covers