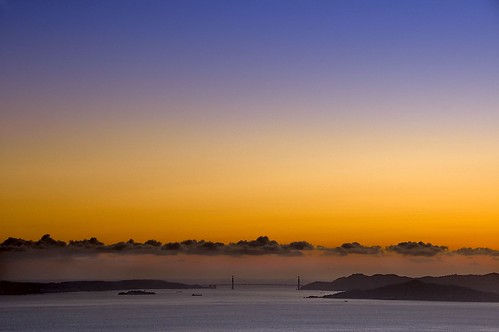
I photographed this view of the Golden Gate at sunset from Wildcat Peak a few weeks ago during the same session that I captured the Eyes of a Newt.
When I reviewed my captures from the session just now, I liked this capture of the Golden Gate at sunset for the immense and wonderful gradient in the sky above the firm line of clouds. However, I worried that when I lightened the bottom of the image, the amount of noise that lightening would introduce would conflict with the pristine quality of the image.
A valid fear indeed! In Photoshop’s RAW capture conversion module, on the layer that I used from the RAW capture for the foreground, I pushed the slider for Shade to the minimum. The result was a ton of noise, digital’s analog to analog’s grain. Put another way, noise is to digital as grain is to film. By whatever name, in the context of this image, yuck!
I’ve had good luck using Noise Ninja’s Photoshop plug-in to reduce noise. This time it was clear to me that I needed radical noise reduction on the lower portion of the image, and none at all on the sky.
So I duplicated my background layer, and operated Noise Ninja on the duplicate layer. This gave me the opportunity to crank Noise Ninja to the max, and yet only apply it where I wanted in the underlying image through selective layer masking. I also applied Noise Ninja several times, the first time set high, and the second time using normal settings. On the second setting, I applied the noise reduction only to the luminance of the portion of the image I was modifying by using the Fade command and selecting Luminance as the blending mode.
On the whole, Noise Ninja worked pretty well!

Pingback: Photoblog 2.0: » Photoblog 2.0 Archive: » Golden Wonder
Pingback: Photoblog 2.0: » Photoblog 2.0 Archive: » Night Sky
Pingback: Photoblog 2.0: » Photoblog 2.0 Archive: » Mathew on His Third Birthday