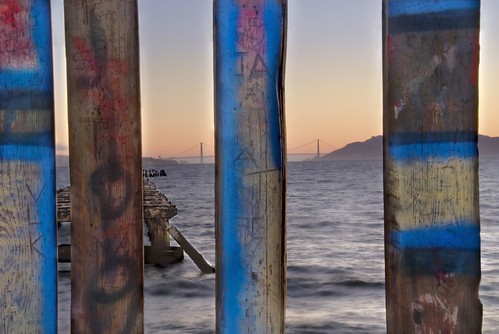
This is a photo from the end of the Berkeley Pier looking towards the Golden Gate Bridge. The Berkeley pier seems like it goes half way across San Francisco Bay to Alcatraz, but at one time it must have stretched futher than it does now. The boards block the end of the pier, prevent people from falling into the water, and make a good canvas for graffitists.
When taking the photo, I positioned myself well back from the boards at the end of the pier, used a moderately telephoto lens, a decently long exposure, and stopped the lens down as far as possible. The point of these choices was to maximize depth-of-field and get boards and the Golden Gate Bridge in focus (with the partially blurred water a bonus). [62mm focal length for 93mm equivalence in 35mm terms, 3/5 of a second at f/32, tripod mounted.]
I exposed the original RAW capture for the Golden Gate Bridge, which meant that the boards in the foreground of the photo appeared very dark and underexposed. To correct this problem, and bring out the wonderful glowing colors on these boards, I needed to do a second pass at the RAW original, correcting the exposure values with the boards in mind.
The two versions, one corrected for the Golden Gate Bridge, sky, and water and the other using exposure settings for the boards needed to be combined as layers using a mask. If I’d applied the light exposure values I used on the boards to the bridge, the bridge would have been overexposed, so the point of the mask was to selectively apply the exposure values.
I was able to create an appropriate mask by converting a duplicate of the darker version of the image to LAB color. Next, I dropped the A and B channels of the image, leaving just the luminosity information. I used an adjustment curve to heighten the contrast, and converted the image to grayscale. I used Photoshop’s Image > Apply Image command to use this black-and-white version, which showed the boards as black shapes and everything else as white, in my original, layered image. A little hand painting on the mask finished the job.
Here’s why the process I used to create this image from a single RAW photo is not exactly High Dynamic Range (HDR) photography.
