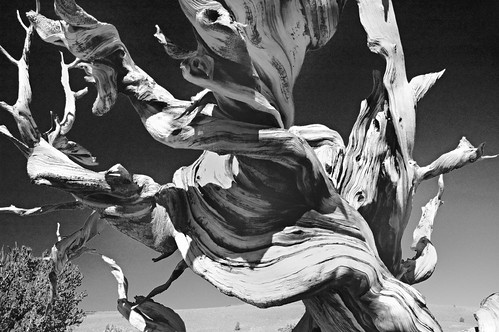
In a couple of previous posts, I explained a number of different techniques for converting color digital photos to black and white in Photoshop. See More Black and White Conversion Fun and Converting to Black and White.
If you are going to convert to black and white, quite possibly it is because you want your photo to look like a classic black and white print. (You know, like one by Ansel somebody or other…). Now, the fact of life was the film, and silver-halide photo paper for prints, had grain. This grain was formed by the silver used in the exposure process and was irregular: not at all like digital noise.
Now, as a master black and white photographer and print maker, most likely one strived like all get out to reduce the apparent grain, or make it “fine”–that is, small in granular size. But like the Biblical poor who are always with one, grain was always with black and white film photography and prints. It can be thought of as a hallmark of classical silver-halide analog photography.
So as I thought about my black and white conversions, I realized that probably a touch of grain should be added.
Fortunately, Photoshop comes with a Film Grain filter (found under Artistic Filters). This filter should not be confused with the Texture > Grain Filter. Like many Photoshop filters, it only operates on 8-bit (not 16-bit) images, so if you are working in 16 bits you will have to convert your image mode to apply it.
To apply the Artistic > Film Grain filter to the black and white conversion, I created a duplicate layer. I applied the filter to the duplicate layer, using (after considerable trial and error) settings of Grain = 6, Highlight Area = 11, and Intensity = 6. I set Opacity for this layer to 18%.
Next, I duplicated the grain layer with the intention of blurring the edges of the grain to make it look more like “real” grain in film. Working on this “grain blur” layer, I used the Gaussian Blur filter (found in Filter > Blur) with the pixel radius at the default setting of 1.0. I set the Opacity for the grain blur” layer to 23%.
The impact is pretty much like fairly fine-grained film. Note that if you are planning to make prints using this technique, you’ll need to experiment to find settings that actually look like decent silver-halide prints on your digital printer (depending on the specifics of your printer).

Pingback: Photoblog 2.0: » Photoblog 2.0 Archive: » Kodak’s Digital Future
Pingback: Photoblog 2.0: » Photoblog 2.0 Archive: » In the Bag