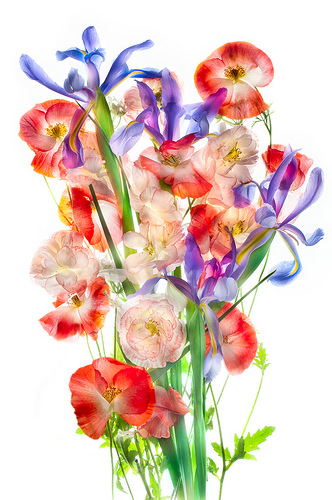
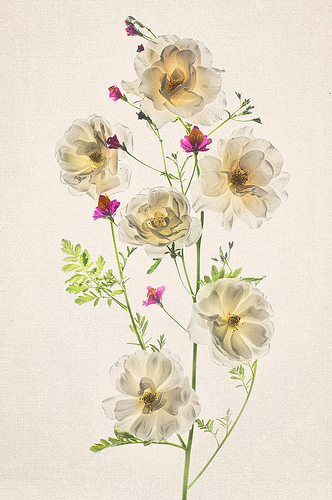
So far as I know I am the inventor of my process for creating images of flowers using a lightbox that are transparent—actually, images that seem translucent. This process relies on digital capture and post-production techniques and would not have been possible in film photography.
Like all photography the technique relies on illusion. Specifically, the illusion in this case has to do with the fact that lighter areas in an image can appear more translucent to the human eye—whether or not they actually are. The reality is that the effect has to do with color differential rather than degrees of opacity, but this is not the way the difference is perceived.

The technique for creating these images involves four distinctive stages, with aspects worthy of commentary at each stage:
- Manually bracketed HDR (High Dynamic Range) photography using backlighting
- Combining the bracketed exposure sequence using hand-HDR
- Adjusting the combined image
- Placing the image on a scanned or textured background (this step is optional)
The key observations about the HDR process I use in this technique are that it is high-key and that it is manual. High-key means that I throw away everything to the right of the histogram, I am really only looking for frames that are “overexposed” (at least according to the in-camera light meter). Manual means that I am not using an auto-bracketing program. There is more information about this style of HDR in Creating HDR Photos on pages 82-85.
In my book Photographing Flowers: Exploring Macro Worlds with Harold Davis there is a spread showing both the photographic setup I use for this technique and the manually bracketed exposure sequence that I used with a specific image (pages 184-185).
Putting together the bracketed exposure sequence is also a manual affair. Essentially, I start with the lightest image (to use as the white background) and use Photoshop to selectively paint in the contrasting areas I want for the final image. Usually this involves 4-6 different exposures and layers. I then often very selectively paste in some structurized details from an automated HDR program such as Nik HDR Efex Pro.

With Schizanthus grahamii and Iceberg Roses (shown above) I used a 40mm macro lens, and with my camera on a tripod shot six exposures with shutter speeds ranging from one second to 1/100 of a second. Each exposure was at f/10 and ISO 100. I combined the images starting with the one second exposure version (the lightest capture) as the bottom frame.
The image was finished by placing it on a scanned paper background. The formula I usually use is to blend the floral on white into a scanned background at 15% opacity using Normal blending mode, and (using a duplicate layer) also at 85% opacity using Multiply blending mode.
My technique for placement on a scanned paper background is shown and explained on pages 190-193 of Photographing Flowers.

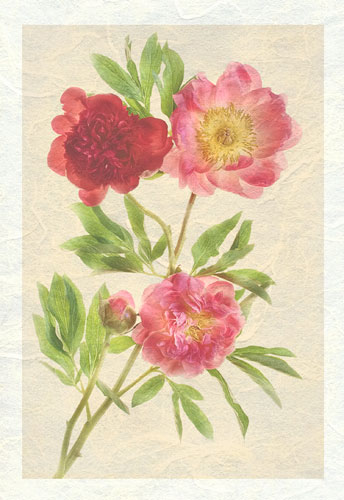
Of course, another issue is the paper I print the image on—using special Washi such as the Moab Moenkopi Unruyu I used to print Peonies mon amour (shown above) can increase the appeal of an image greatly.
If my technique for photographing flowers on a lightbox intrigues you, may I suggest the Photographing Flowers for Transparency workshop I am giving in December 2012? This is a one-time special purpose event that will include demos and a chance for participants to try their hand at the technique with my guidance.
Pingback: When Dahlias Dream
Pingback: White Dalhias
Pingback: Flowers of Late Summer
Angelina
22 Mar 2017Harold- I am interested in learning to photograph flowers. What kind of lightbox do you recommend?
Thank you.
Harold Davis
23 Mar 2017Thanks for the question! Please see the FAQs on my website, particularly https://www.digitalfieldguide.com/faqs/faq-photographing-flowers-for-transparency, for information on the topic of light boxes. Best wishes, Harold
Juliana
15 Jan 2019Hi,
You did the great job on white flowers. Interesting.