What is a layer stack?
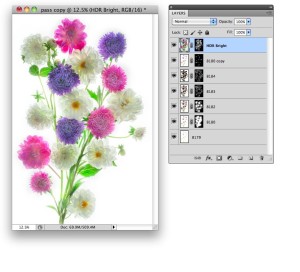
A layer stack in Photoshop is a combination of Photoshop layers placed one on top of the other. If the layer stack is created from a bracketed sequence of imagery shot for HDR, then the layers are usually precisely aligned. A layer’s Blending Mode specifies how the pixels in the layer inter-operate with the pixels in the layer beneath it. Besides choosing a blending mode, it is possible to adjust the opacity of a layer, and to wholly or partially mask it.
How do I create a layer stack in Photoshop?
There are many ways to stack layers in Photoshop. The simplest is to use the Move tool to drag one images that is open as a layer in Photoshop over another image. If the Shift key is held down at the time of the drag-and-drop operation, then the boundaries of the layers will be precisely aligned (assuming they are the same size).
A sequence of images can also be exported to Photoshop as layer stack from applications such as Lightroom and Adobe Bridge.
What does “high-key” mean?
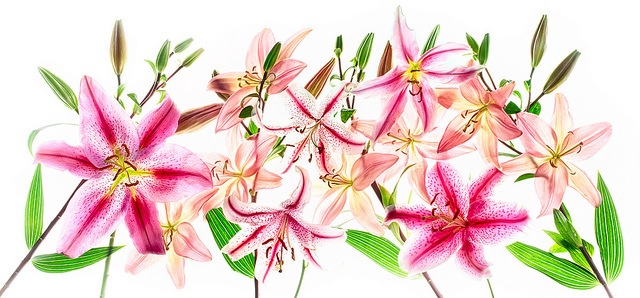
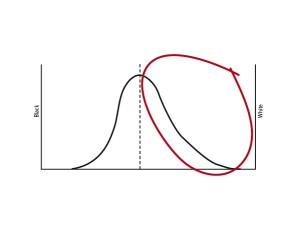
A high-key image is light and bright, and may even tend towards white. More technically, a high-key image is one that is biased towards the right on an exposure histogram. In high-key images, this bias is often extreme, with no values present on the histogram that are to the left of the center.
What is the relationship of a high-key layer stack to photographing flowers for transparency?
When you shoot a bracketed sequence of a high-key backlit subject, such as flowers on a light box, the idea is to break the exposure range down into individual components, and thereby to capture an entire extended exposure range as takes place in conventional HDR. In post-production, the process that occurs is the inverse of this: building the discrete exposures back together to create a single image.
Harold says, “I liken this process to singing harmony with a choir. Each individual voice is performing one part of the music, but when they combine they are seamless and create a musical whole.”
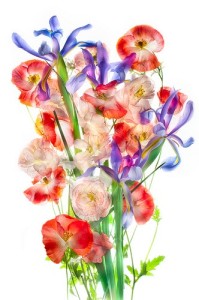
How do I create a transparent effect using a high-key layer stack?
First of all, you can’t create the high-key layer stack with a bracketed high-key sequence of exposures (see the Photographing Flowers for Transparency FAQ). Next, the term “transparency” is a misnomer. Actually, we are trying for the appearance of partial transparency, also called translucency.
The illusion of translucency is created by contrasting lights and darks in apparently overlapping subject matter. Breaking down a high-key subject into separate layers allows specific and pinpointed control of the darkness and lightness in each layer and across the entire range of subject matter. When this is perceived in the final subject matter, human vision and the interpretation in the brain “sees” it as partial transparency.
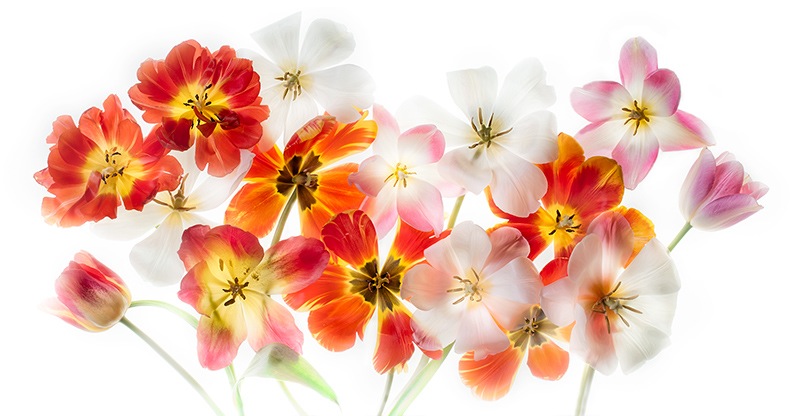
What do I do about the “grey blurs”?
The dread grey blurs that sometimes occur in this work are the result of imprecise layer masking. In other words, a darker layer has come through—often appearing as a blurred edge—around the subject, or sometimes as an overall grey background.
We all have this problem from time to time. The best solution is to work on your Photoshop masking skills. For more information, please check out the Photographing Flowers for Transparency sequence of video recordings (linked on our Webinar recordings page), the material in Creative Garden Photography starting on page 250, and keep your eye out for a live webinar session covering the topic (where you can ask questions).
Are flowers the only subjects that can benefit from a high-key layer stack?
No. Absolutely not. Many subjects can benefit from this treatment, including vegetables, glassware, jewelry and more.

How do I photograph a sequence to be used as the basis for a high key layer stack?
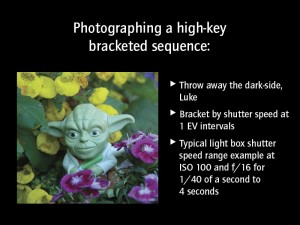
Harold says, “This technique works best with your camera on a tripod. Use manual exposure. Take a light meter reading to determine what the camera thinks is the proper exposure. This will essentially be the center of the exposure histogram, and is your starting place. You are not interested in anything darker than this starting exposure. With this starting exposure, begin manually bracketing shots, using shutter speed to bracket. Each exposure should be +1 EV from the last one. When your image as seen on the LCD is almost completely white, stop the exposure sequence.”
A typical light box exposure at ISO 100 and f/16 might be from 1/40 of a second to 4 seconds, and include ten separate exposures.
Where can I go for further information?
Please consider purchasing access to our webinar recording on this topic, Painting in Transparency Using a High-Key Layer Stack. You will also find a good deal of related information in our FAQ Photographing Flowers for Transparency. You can learn more about our webinars and webinar recordings here.
A number of Harold’s books contain step-by-step information on working with Photoshop layer stacks. This topic is thoroughly explored in The Photoshop Darkroom (Focal Press), Creating HDR Photos (Amphoto) and The Way of the Digital Photographer (Peachpit).
A live workshop with Harold Davis is a great way to learn a specific technique, such as working with a high-key layer stack. If this subject interests you, please consider Harold’s Photoshop workshops and his Photographing Flowers for Transparency workshop.
You can information about upcoming Harold Davis workshops on our Workshops & Events page.
Do you provide practice files for learning this technique, associated either with a webinar or one of your books?
I am often asked this, and I would like to be able to oblige. But, no, I am sorry, I do not provide files for the purpose of practicing or following along. This is for two reasons, one practical and the other both philosophic and pedagogic.
The practical reason is that I cannot release my RAW files “into the wild.” I am a practicing visual artist, and as such I support my family with my art. These RAW files are my livelihood, and it is not reasonable or fair to ask me to give these files away.
The philosophic issue is that I believe that people are more creative learners if they work visual issues through in the context of their own work. If you understand the principles that I teach, it should easily be possible for you to create your own practice files. I can only suggest with all due respect that photographers who are reluctant to create their own files either do not truly understand the process (in which case, please watch my webinars again or attend a live workshop), or are being a bit lazy.
Half measures do not avail us here! You will truly learn my process and techniques if you work through them from beginning to end, either in one of my workshops or own your own. If you make a technique your own, then you can modify it creatively and come up with something original. I am happy to share my creative ideas and techniques, but I would like to see you do your own work, not merely attempt to copy mine.
